Garage
Step-by-Step Guide to Applying Garage Floor Epoxy
Garage Epoxy Floor Guide: Step-by-Step Instructions for a Stronger Garage Floor
Garage floors take a beating from cars, tools, and spills. That’s why many homeowners choose durable epoxy coatings instead of paint.
This Garage Epoxy Floor Guide will help you apply epoxy correctly. With the right tools and preparation, the process becomes manageable.
Unlike standard paint, epoxy forms a hard, chemical-resistant surface perfect for high-traffic garage environments.
Why Choose Epoxy for Garage Floors?
Epoxy coatings are extremely durable and ideal for demanding garage conditions. They resist oil, chemicals, scratches, and heavy impact damage.
More importantly, epoxy provides a clean, professional look. It also protects concrete from moisture, salt, and daily wear.
You can customize epoxy floors with color chips and finishes. This versatility makes it a top choice for modern homeowners.
DIY or Professional? Compare Before You Begin
Applying epoxy yourself is affordable and achievable. Most kits include detailed instructions that beginners can follow with patience and care.
However, professional installations guarantee perfect finishes. Contractors bring experience, precision, and faster results—at a significantly higher cost.
DIY kits cost around $2 to $5 per square foot, while professional epoxy jobs range from $3 to $12 per square foot.
What You Need Before Starting the Project
To complete your epoxy garage floor, gather essential supplies before you begin to avoid frustrating interruptions later.
Equipment and Tools
- Broom and shop vacuum
- Garden hose
- Work gloves and eye protection
- 3-inch paintbrush
- 9-inch roller with 1/2-inch-nap roller cover
- Roller extension handle
Materials
- Concrete degreaser
- Epoxy floor coating kit
- Painter’s tape
Kits usually contain epoxy, etching solution, and optional color chips. Double-check contents before buying to ensure everything is included.
Surface Prep: The Foundation of a Perfect Epoxy Finish
1. Remove All Debris
Use a broom, vacuum, and scraper to clean the garage floor. Clear away all dust, dirt, and debris completely.
2. Degrease the Floor
Wet the surface and apply degreaser in sections. Use a power scrubber or stiff brush for corners and stubborn grease.
3. Etch the Concrete
Courtesy of Grant Webster
Etching prepares concrete for epoxy. Mix the etching solution as instructed and scrub it into the floor thoroughly.
Let the solution sit for 20 to 30 minutes. This process helps epoxy bond better to the concrete surface.
4. Rinse and Dry
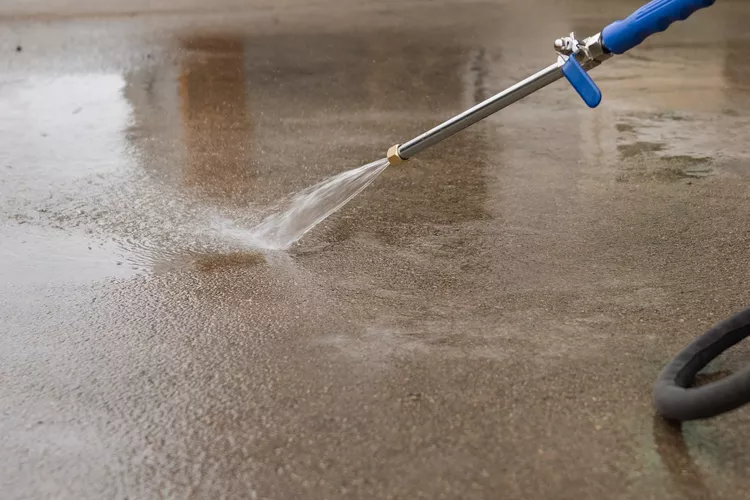
Courtesy of Grant Webster
Rinse the floor well with water. Allow it to dry completely before moving forward with the coating application.
5. Prepare the Room
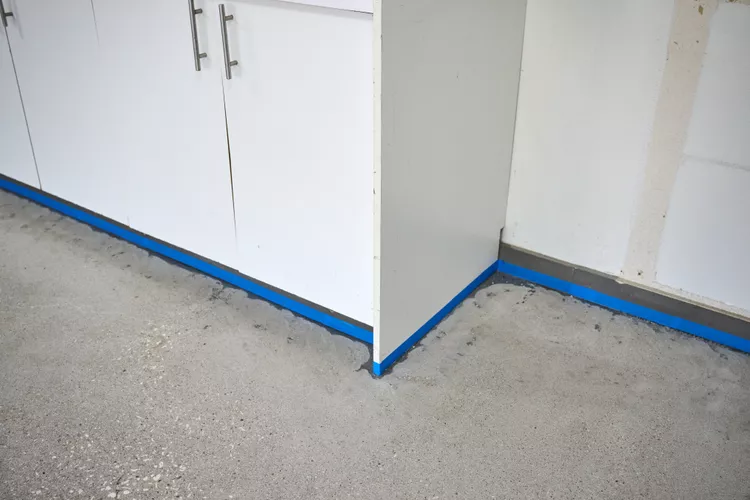
Courtesy of Grant Webster
Tape off baseboards and wall edges. Remove any baseboards to keep paint lines clean and professional-looking.
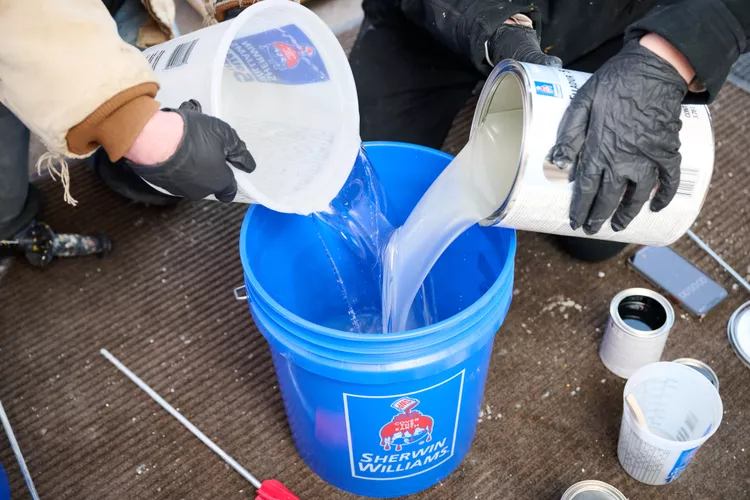
6. Mix the Epoxy

Courtesy of Grant Webster
Follow the product’s directions closely. Mix the resin and hardener thoroughly until the color and texture are uniform.
Let the mixture rest as instructed. Skipping this step may cause the epoxy to harden too soon or cure unevenly.
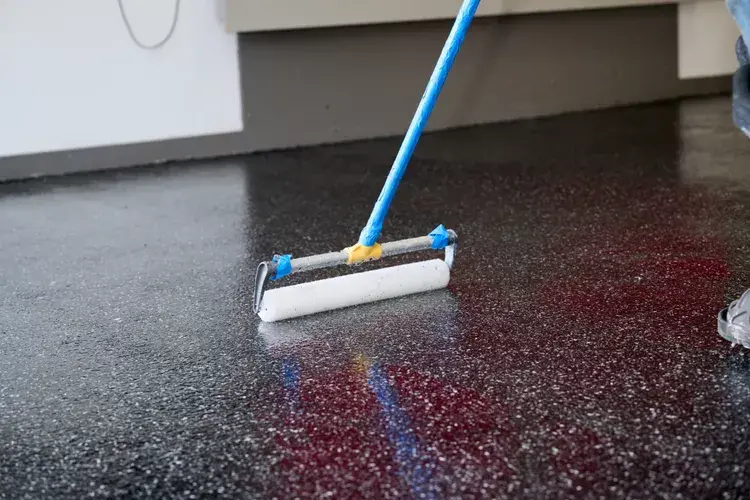
7. Apply the Epoxy
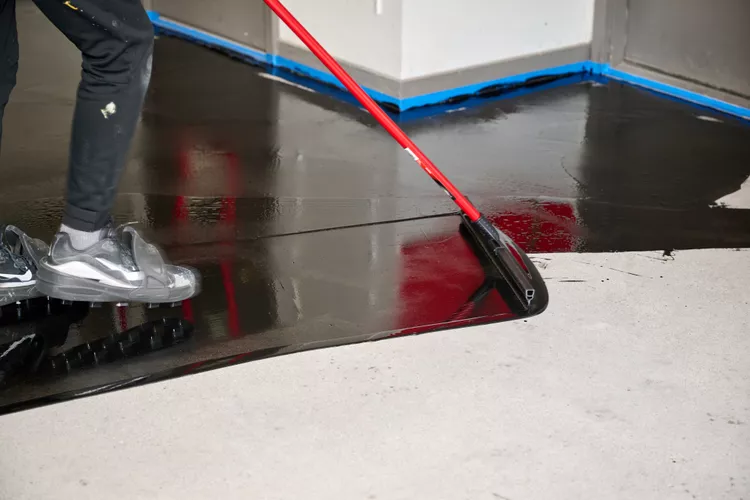
Courtesy of Grant Webster
Cut in edges with a brush. Then roll epoxy onto the floor using the roller in 10-by-10-foot sections.
Always maintain a wet edge to avoid roller marks. Move steadily and work with a partner to save valuable time.
8. Apply Color Chips
Sprinkle color chips onto wet epoxy. Toss them by hand for even coverage. Decorative flakes enhance appearance and texture.
Work section by section to ensure consistent results. This step must be done before the epoxy starts to cure.
Let the floor dry for 24 hours before walking on it. Wait four to seven days before parking your vehicle.
Maintenance and Durability: What to Expect from Epoxy Floors
Epoxy floors last between 10 to 20 years with regular maintenance. Sweep often and mop with mild cleaners as needed.
Avoid harsh chemicals or dragging sharp tools. Consider adding anti-slip additives to reduce the risk of slipping when floors are wet.
This Garage Epoxy Floor Guide helps extend your floor’s life while maintaining its glossy, clean appearance.
Common Epoxy Floor Questions Answered
How long does epoxy flooring last?
Garage epoxy floors typically last 10 to 20 years depending on foot traffic, vehicle usage, and overall maintenance efforts.
Can I apply epoxy myself?
Yes, even beginners can apply epoxy with time and careful preparation. Always read the manufacturer’s instructions before beginning.
What are epoxy’s disadvantages?
Epoxy takes longer to dry than paint and can feel slippery when wet. It also requires full concrete curing first.
Final Thoughts: Use This Garage Epoxy Floor Guide to Get Started
Epoxy transforms your garage from dull concrete into a sleek, durable workspace that’s easy to clean and highly resilient.
With planning and care, this Garage Epoxy Floor Guide makes it easy to create a surface that lasts for decades.
Follow each step closely and invest time in preparation. That’s how you ensure success in every DIY floor coating project.
For more expert home improvement news, explore more stories on this website.