Plumbing
13 Easy Steps to Install a Water Softener at Home
Water Softener Installation Guide: How to Install a Water Softener Step-by-Step
Installing a water softener can reduce mineral buildup, preserve plumbing systems, and improve your daily comfort with cleaner, softened water.
This comprehensive Water Softener Installation Guide provides step-by-step instructions for successful DIY installation, helping you enjoy better water quality at home.
Why You Need a Water Softener in Your Home
Hard water leaves stains, fades clothes, and causes mineral buildup inside appliances, significantly reducing their efficiency and life span.
By installing a water softener, you eliminate magnesium and calcium ions that create hardness and replace them with sodium or potassium ions.
This transformation reduces spotting on dishes, brightens your laundry, and softens skin and hair by removing harsh minerals from tap water.
Tools and Materials Required Before Starting Installation
Proper preparation ensures smooth installation. Before starting, gather your tools, plumbing materials, and read the instructions for your specific softener model.
Required Tools
- Slip joint pliers
- Adjustable wrench
- Plumber’s tape
- Tape measure
- Pipe cutter
- Soldering torch (if needed)
- Screwdriver
- Sandpaper
Required Supplies
- Water softener unit
- Compatible plumbing piping
- Plumbing fittings and adapters
- Plumbing tees and connectors
Step-by-Step Water Softener Installation Guide
Follow each step carefully to avoid leaks, ensure a secure setup, and optimize your system’s performance for long-term household benefits.
Step 1: Choose the Right Location
Install your water softener on level ground, near an outlet and within 30 feet of a floor drain or utility sink.
The best spot is near the main water line, just before it enters your water heater, to ensure soft water throughout the home.
Avoid placing your water softener between the main line and any outdoor faucets used for irrigation or gardening purposes.
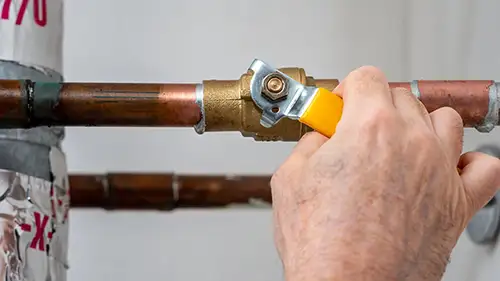
Step 2: Turn Off the Water Supply
Shut off your home’s main water supply to avoid leaks, spills, or flooding while installing new pipes and fittings.
Locate the main water valve near your water meter or where the water line enters your house, and close it completely.
Step 3: Drain Water From the Pipes
Open every faucet in the house to fully drain remaining water from pipes and release air pressure before beginning your installation.
Once water stops flowing and the faucets are dry, close them all again and proceed with the installation steps.
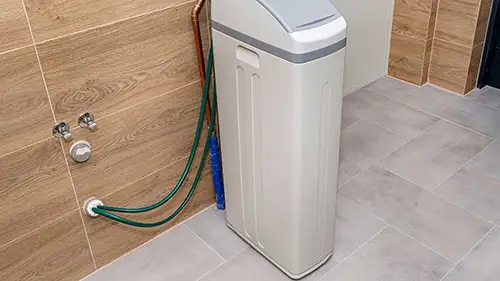
Step 4: Position the Water Softener Unit
Carefully carry the softener unit into position. Most units weigh up to 100 pounds when empty, so ask for help.
Position the unit with proper clearance for plumbing connections and easy access for maintenance or future salt refills.
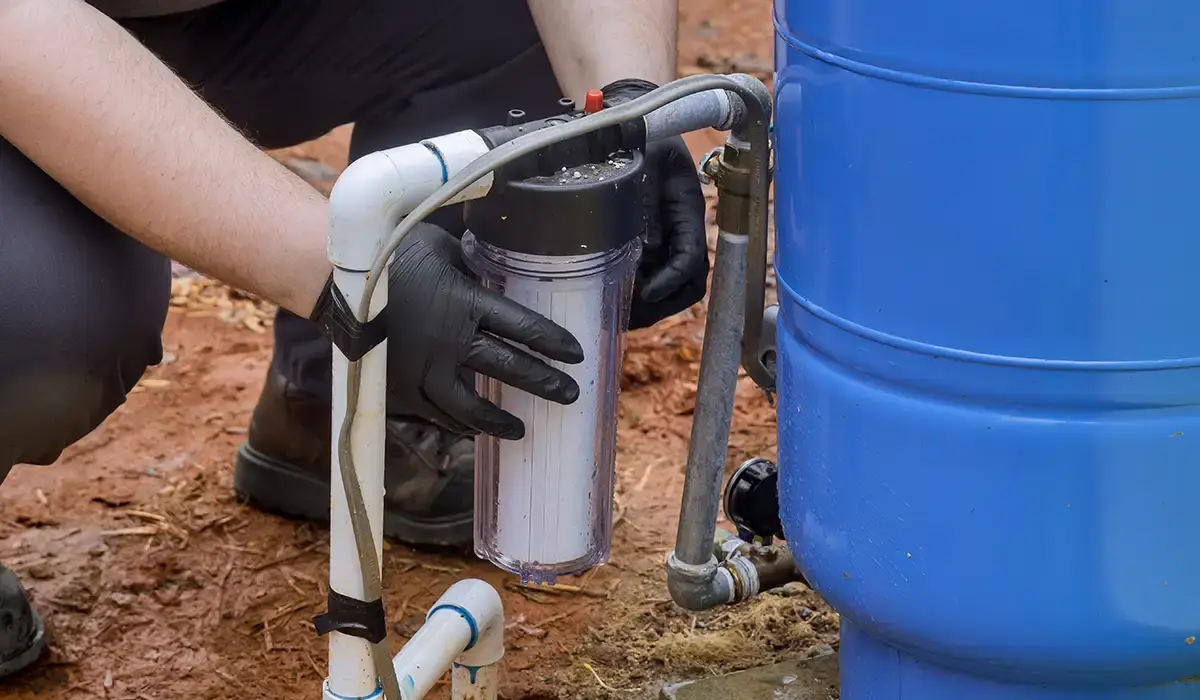
Step 5: Cut and Prepare the Main Water Supply Line
Use a pipe cutter to remove a section of the main water line where the bypass valve will be installed for the softener.
Smooth any rough edges with sandpaper and prepare the pipe ends for fitting adapters or connectors depending on pipe material.
Step 6: Connect Plumbing Adapters and Flex Lines
Attach adapters to each end of the water line where cuts were made. Use soldering or clamps depending on your system’s requirements.
Next, connect flexible plumbing lines to these adapters. Tighten each fitting with a wrench without overtightening to prevent cracks.
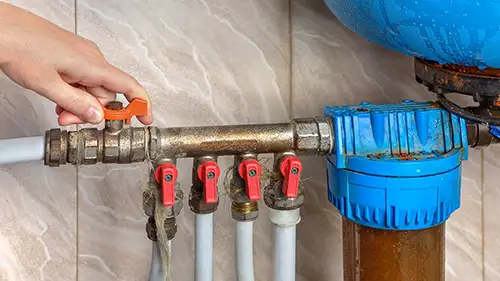
Step 7: Connect Lines to the Water Softener
Attach flexible lines from the input and output valves on your softener. Align them to match your home’s water flow direction.
Ensure the incoming line comes from the main water source, and the outgoing line connects toward the water heater and faucets.
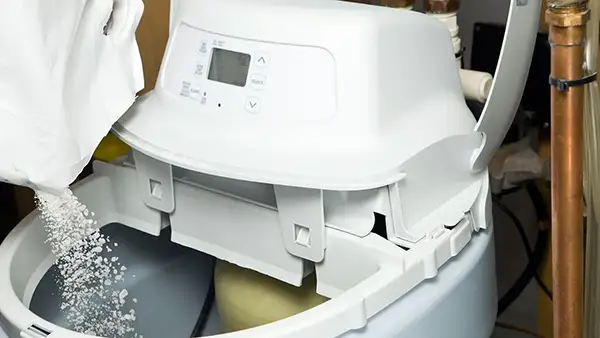
Step 8: Connect the Brine Tank and Mineral Tank
If your unit includes separate brine or mineral tanks, connect each one using the provided tubing and hose clamps from the manufacturer.
Secure the brine tank first, followed by the mineral tank, keeping all hoses tight and leak-free to ensure optimal functionality.
Step 9: Install Drain Tubes for Regeneration Cycle
Attach a drain line to the softener’s control valve and route it to a standpipe or utility sink capable of handling drainage volume.
Some systems also include an overflow tube from the brine tank—connect this separately and never merge it with the main drain.
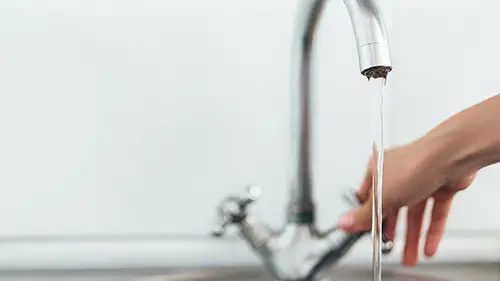
Step 10: Turn On the Water Supply and Check for Leaks
Slowly restore water supply by turning the main valve back on. Then, open a faucet to relieve air and pressurize your pipes.
Inspect all joints for leaks during this process. If any water escapes, tighten fittings and recheck until no leakage remains.
Step 11: Program and Start the Water Softener Unit
Plug in your softener unit and follow the manufacturer’s guide for initial setup, including setting the hardness level and clock time.
Add water softener salt to the brine tank as specified. Choose solar or evaporated salt for high efficiency and fewer blockages.
Step 12: Run the Backwash or Regeneration Cycle
Start the backwash or regeneration cycle as directed in your manual. This process prepares the resin tank and completes the setup.
Afterward, recheck water levels in all tanks. Confirm all fittings are secure, and your system is fully operational and leak-free.
Key Considerations from the Water Softener Installation Guide
This Water Softener Installation Guide emphasizes careful planning. However, other important factors also influence your installation experience and softener selection.
Installation Costs
Water softener systems cost between $200 and $5,000 depending on type and features. Add $150 to $1,000 if hiring a professional installer.
Salt-based systems have additional maintenance and salt expenses. Factor these into your long-term household budgeting plan before committing to a model.
Types of Water Softeners
Most homes use salt-based ion-exchange systems, but alternatives exist like magnetic softeners, salt-free conditioners, and reverse osmosis filtration units.
Each type has pros and cons. Ion-exchange softeners are most effective but require ongoing salt replenishment and regeneration cycles.
Sizing and Grain Capacity
Softener capacity is measured in grains per gallon. Match your softener size to household needs using your water usage and hardness level.
Small homes use 16,000–32,000 grain models, while larger homes require 40,000–100,000 grain units depending on daily water demand.
Choosing the Right Salt
Different salt types suit different needs. Choose solar salt or evaporated salt for purity, efficiency, and reduced buildup over time.
Avoid rock salt unless cost is your top concern. It’s more affordable but less pure and may shorten your softener’s life span.
Well Water vs. City Water Systems
Well water usually contains more minerals, so dual-tank softeners are recommended. These systems ensure continuous soft water during regeneration cycles.
City water typically requires less aggressive filtration. Single-tank softeners are sufficient and often easier to install in urban settings.
DIY vs. Hiring a Professional
Installing a softener yourself saves money, but mistakes can be costly. For complex setups, hiring a plumber may save time and frustration.
A professional can complete the job in under three hours and ensures compliance with plumbing codes and manufacturer warranty requirements.
Benefits of Installing a Water Softener System
The benefits of installing a water softener include longer appliance life, softer skin, brighter clothes, and cleaner dishes with fewer spots.
It also reduces energy costs by preventing scale buildup in water heaters and improves plumbing efficiency throughout the entire home system.
Following this Water Softener Installation Guide will help you achieve these benefits confidently with either DIY or professional help.
Looking for additional home improvement tips, water-saving solutions, or energy-efficient upgrades? Explore more expert guides on this website today!