Lightning & Electrical
Everything You Need to Know About Combination Switches and Outlets
Combination Switch Outlet Guide
Understanding your home’s electrical system helps increase safety and efficiency throughout the house. This includes knowing your combination switches.
Why You Should Learn About Combination Switches
Most homeowners only flip a switch and assume everything works fine. However, electrical components play essential roles behind every wall.
Your home likely includes switches, outlets, and combinations of both. This Combination Switch Outlet Guide explores how these devices function and how to install them.
Combination switches provide the convenience of controlling more than one electrical function in a compact unit. These units save space and allow for creative wiring configurations.
Tools and Materials for Installation
Before installation, gather these tools and materials to ensure you complete your project correctly, safely, and efficiently every time.
Required Tools and Materials
- Screwdriver for tightening and loosening terminals on the switch
- Wire strippers for preparing wires before connecting
- Side cutters to trim excess wire
- Long-nose pliers to help bend and shape wire ends
- Electrician’s tape for insulation and safety
- Combination switch unit of your choice
- Additional wire for pigtails as needed
Wiring a Double Switch
Double switches operate two separate devices from a single wall box. You will use three cables to accomplish this setup.
Connect all the ground wires first to establish a safe working environment and comply with electrical codes. Splice all white (neutral) wires together securely.
Next, attach the power feed wire to the terminal that includes a connecting tab. Connect the two black wires from the separate fixtures to terminals without the tab.
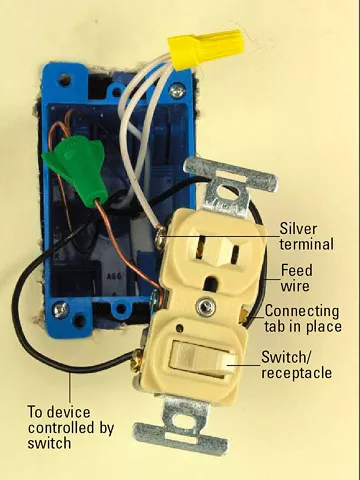
Creating an Unswitched Plug
You may want one outlet to always stay powered while another is switch-controlled. This setup allows better versatility in outlet use.
Splice all white wires and attach a pigtail to the silver terminal. Connect the power (hot) wire to the brass terminal that includes the tab.
Then, attach the wire from the switch-controlled fixture to the brass terminal without the connecting tab to complete the configuration.
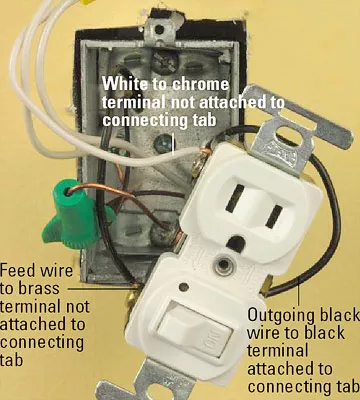
Installing a Switch-Controlled Receptacle
To create a switch-controlled receptacle mid-circuit, you must first connect all ground wires for safety. Prepare a white pigtail for the job.
Connect the pigtail to a chrome terminal on the side of the outlet without the tab. Splice all white wires securely.
Attach the black power feed wire to the brass terminal not connected to the tab. Finally, attach the outgoing black wire to one of the terminals next to the tab.
Types of Switches and Receptacles
Understanding available switch and receptacle types ensures you install the right combination switch for your specific need.
Toggle Switch with Dimmer

Toggle switches with dimmers allow you to adjust light intensity using a side-mounted slider. The slider sets your preferred light level.
You can also adjust brightness anytime after powering on the light. These units are ideal for creating ambiance and saving energy.
Remote Fan Control and Light Switch
If you install a ceiling fan, use a remote wall-mounted switch for light and fan control without running new wires.
These remotes look like traditional switches but provide modern functionality. You can adjust fan speed and lighting separately using built-in controls.
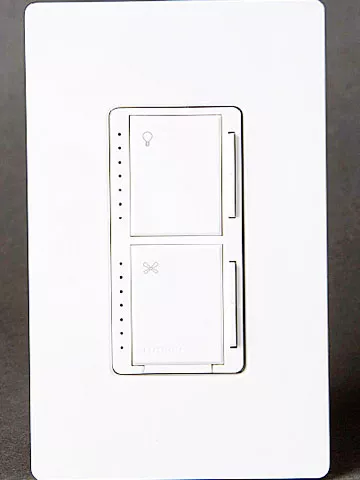
Fan Control with Dimmer and Module
Control multiple ceiling fans from a single location by installing a smart fan control with dimmer and module.
This system includes a wall-mounted switch and modules that attach to each fan, providing full remote functionality from a central point.
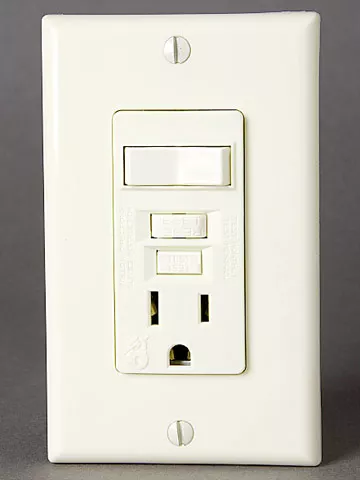
GFCI Combination Switches

The Combination Switch Outlet Guide includes information about GFCI units. These switches combine ground fault protection with light or fan controls.
Use them in kitchens, bathrooms, and laundry rooms where safety from electrical shock matters. These switches reduce risks of moisture-related hazards.
Motion Detectors with Adjustable Photocell
Install motion-sensing switches that detect movement and light levels to operate automatically. These reduce electricity waste and improve convenience.
When you leave the room, the light turns off automatically. Set time delays and manual override options for custom use preferences.
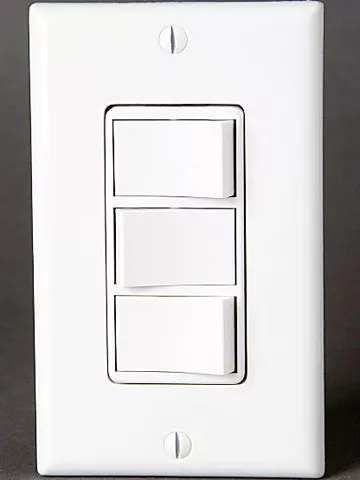
Triple Switch Devices
Triple switches handle complex lighting schemes using one device. Control multiple light sources without cluttering your wall space.
These switches work well in large rooms with multiple lighting zones. They also allow centralized control without additional wall space.
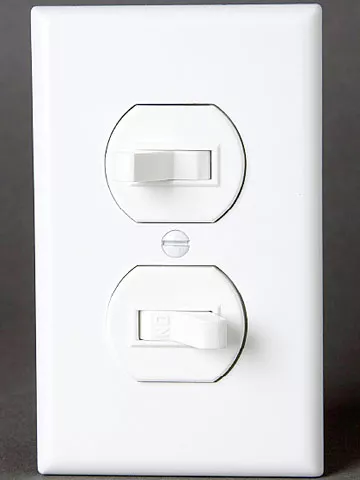
Single-Pole and Three-Way Combinations
Use combination switches that include both single-pole and three-way switches for greater flexibility, especially near staircases or large halls.
These switches provide control from multiple locations while managing lights for shared spaces. Combine functionality in one compact unit easily.
Switches with Pilot Light Indicators
Pilot light switches help verify power status for critical lighting. Know whether you left the garage light on with a glance.
If the pilot light glows, then the connected fixture remains powered. These switches add peace of mind in everyday use cases.
Safety Tips for Installation
- Always turn off power before replacing or installing any switch.
- Use a voltage tester to confirm no electricity flows through the circuit.
- Cut and restrip older wires to prevent breaks during reconnection.
- Do not install switches in damp areas without proper protection.
Final Thoughts
Now that you have learned about combination switches, you can safely install them in your home. This Combination Switch Outlet Guide makes that easier.
Combination switches offer powerful solutions for small spaces and modern needs. Customize your lighting and appliance control with confidence.
Explore more home improvement tips, guides, and smart wiring solutions by visiting our website for the latest updates and inspiration.