Bathroom
The Right Way to Caulk Your Bathroom: Dos and Don’ts
Sealing your bathroom properly keeps moisture away and prevents mold. That’s why learning reliable caulk bathroom tips is so essential. Whether you’re renovating or maintaining, applying caulk the right way makes a major difference. Let’s explore the dos and don’ts to help you get the job done right.
Choose the Right Caulk
Not all caulks perform equally well in wet areas. Always select one labeled specifically for bathroom use. These formulas resist moisture, mold, and mildew. Silicone caulk offers a stronger seal but is harder to apply. Latex caulk is easier to work with but may not last as long. A siliconized latex version, like DAP Kwik Seal Plus, provides a great balance between strength and ease of use.
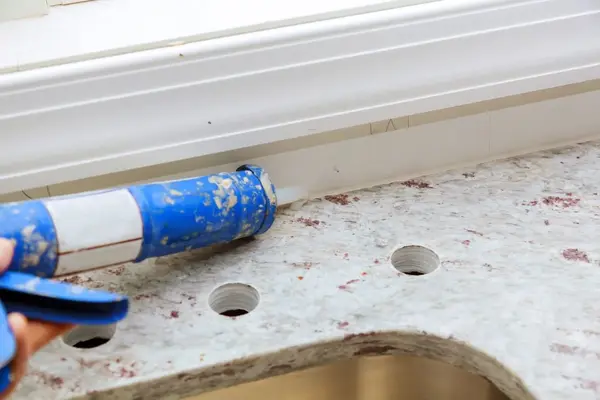
Don’t Skip the Caulk Gun
Using a caulk gun gives you more control and consistency. It applies smooth, even lines and saves your hands from strain. Good caulk guns feature a strong plunger and a quick-release trigger to stop the flow. Skip the hassle of squeezing the tube by hand. Spend a little on a tool that ensures cleaner results.
Cut the Tube Carefully
Cut the caulk tube tip at a 45-degree angle for best results. Start small—cut less than you think you’ll need. Test the width by applying a short bead. If it’s too narrow, trim more and test again. This way, you avoid wasting material or applying messy, oversized lines.
Clean the Area Before Starting
Dirt and moisture can prevent caulk from sticking properly. Clean the surface thoroughly and let it dry completely. Use rubbing alcohol or a mold-killing cleaner to wipe away residue. Clean surfaces help the caulk bond better and last longer. Never skip this step.
Don’t Apply Over Old Caulk
New caulk won’t stick well to old, damaged material. Always remove the previous bead before applying a new one. Use a caulk remover or a utility knife to clean the area. After scraping, wipe with alcohol to remove any residue. Then, let the space dry fully before caulking.
Apply Even Pressure for a Clean Line
Hold the gun at a consistent angle and move steadily. Don’t stop and start. Apply firm, even pressure while pulling the gun slowly. This creates a smooth, neat bead without gaps. Practice on a scrap surface if needed. It helps you get comfortable before working in the actual bathroom.
Don’t Forget to Smooth It Out
After applying the bead, smooth it out with a caulk-smoothing tool or your finger. Wet your finger to keep the caulk from sticking. Work quickly before the caulk dries. Smoothing ensures the caulk seals tightly and looks polished. Always finish each line before the caulk hardens.
Allow Proper Drying Time
Each product has a curing time listed on the label. Respect this timeframe to avoid cracks or gaps. Don’t shower or use the area until the caulk is fully dry. Rushing this step can undo your hard work. Be patient for long-lasting results.
Use Painter’s Tape for Precision
For perfect edges, place painter’s tape above and below the area you’ll caulk. Apply the bead between the lines. Smooth it, then remove the tape immediately. This keeps lines straight and clean with zero mess. It’s especially useful for beginners.
Final Thoughts on Caulking Like a Pro
Mastering these caulk bathroom tips helps prevent water damage, mold, and ugly finishes. With the right tools and technique, anyone can do it. Just remember to clean, prep, and go slow for better control. That’s how you caulk like an expert.