Flooring
Removing Carpet: A Beginner’s How-To
DIY Carpet Removal Tips: A Step-by-Step Home Guide
Old carpet traps allergens and dust, making your home look outdated and feel less fresh and clean.
Removing your carpet yourself is budget-friendly, empowering, and surprisingly straightforward when done with the right tools and technique.
This guide provides practical and effective DIY carpet removal tips to help you tackle this home project like a pro.
You’ll not only save money but also get the chance to inspect and prep your subfloor for new flooring installation.
Why Should You Remove Old Carpet?
Over time, carpets gather dust, stains, and allergens that are tough to clean or completely remove.
DIY carpet removal gives you control and helps prepare your space for new, stylish flooring options.
It also allows you to fix squeaks, uneven areas, or hidden damage beneath your old carpet.
Planning a flooring upgrade to hardwood, tile, or laminate? Removing carpet becomes the first necessary step in the process.
Tools and Safety Gear for DIY Carpet Removal
You need the right tools to ensure a smooth, efficient, and injury-free carpet removal process.
Essential Tools
Gather these essential tools before beginning:
- Utility knife for cutting the carpet into strips
- Pliers to grip and pull the carpet free
- Floor scraper to remove stubborn padding or glue
- Flat pry bar to lift tack strips
- Duct tape to roll and secure carpet sections
Safety Equipment
Protect yourself throughout the job with:
- Gloves to avoid cuts from sharp tack strips
- Knee pads for long periods kneeling on hard floors
- Dust mask to filter airborne particles
Optional But Helpful Tools
These tools can make your job easier:
- Heavy-duty scissors for dense carpet backing
- Hammer to remove nails and tacks
- Shop vacuum for cleaning loose dust and staples
Preparing the Room for Carpet Removal
A little prep goes a long way in making this process faster and cleaner.
Clear Out Furniture
Remove all furniture before you start pulling up carpet.
Cover any immovable items with plastic sheeting to protect them from dust and debris.
Take off any doors that swing into the room for better access around edges and corners.
Wear Safety Gear First
Before cutting or pulling anything, wear gloves, knee pads, and a dust mask.
These protect you from sharp edges and irritants kicked up during the process.
Step-by-Step Carpet Removal Process
Let’s dive into these DIY carpet removal tips to ensure you remove the carpet safely and efficiently.
Start With the Corners
Begin in a room corner. Use pliers to lift the carpet from the tack strip.
If it resists, cut a small square using a utility knife to create a grip point.
Work Across the Room
Continue pulling the carpet from all wall edges, moving in a methodical, section-by-section pattern.
This keeps the project manageable and clean.
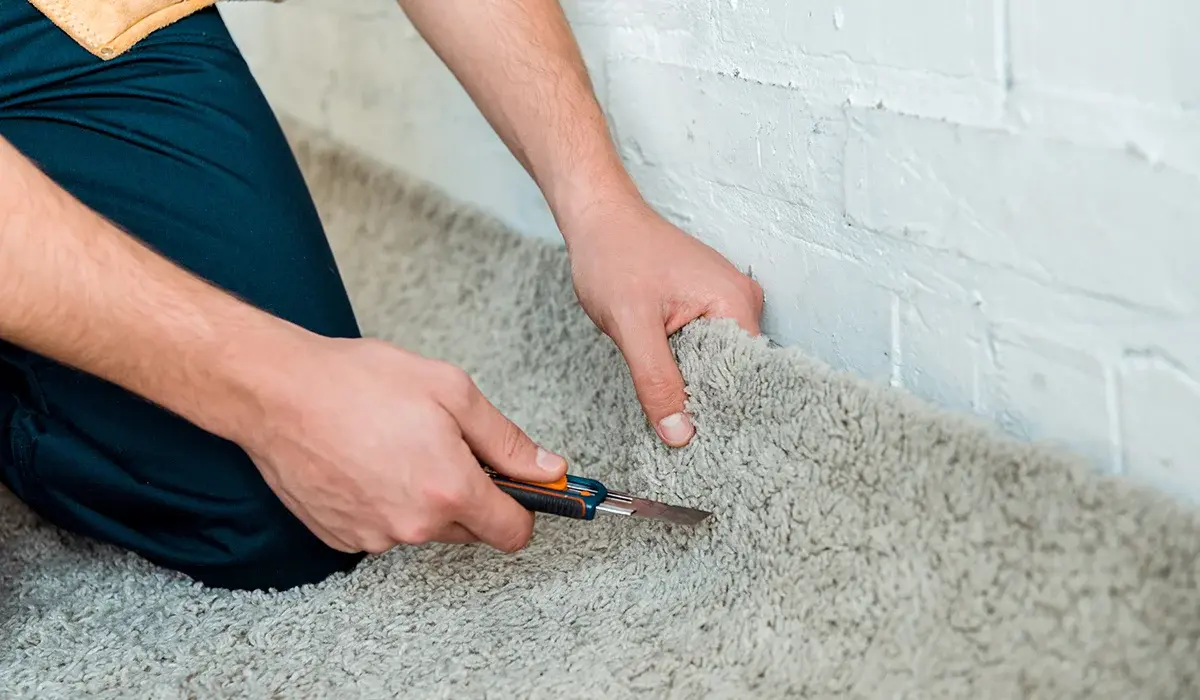
Cut the Carpet Into Strips
Cut the carpet into strips around 3–4 feet wide using your utility knife.
Always cut from the back of the carpet for easier slicing.
These strips are easier to carry and dispose of than full carpet rolls.
Roll and Tape Each Section
After cutting a section, roll it up tightly.
Secure the roll using duct tape. This keeps everything compact and easy to transport.
Continue until all carpet is removed.
Handling Carpet Padding
Padding may be glued or stapled depending on your subfloor type.
This section of DIY carpet removal tips ensures no steps are skipped.
For Glued Padding on Concrete
Pull up what you can.
Use a floor scraper to remove glued-down pieces.
Apply firm pressure and work in small sections.
For Stapled Padding on Wood Subfloors
Pull the padding up by hand.
Then, use the scraper to remove remaining staples.
For exposed hardwood, use a painter’s tool or small screwdriver to avoid scratches.
Tack Strip and Staple Removal
Once the carpet and padding are gone, turn your attention to the tack strips.
When to Keep or Remove Them
If you plan to lay new carpet, you may reuse existing tack strips if they’re still in good shape.
Installing hardwood or laminate? Remove all tack strips entirely.
How to Remove Tack Strips
Use a pry bar to lift each strip, placing the flat edge underneath and applying even pressure.
Be cautious to avoid damaging your subfloor during removal.
DIY Carpet Removal Tips for Challenging Areas
Some spaces need a different approach, especially tight or awkward zones.
Carpeted Stairs
Start at the top and remove one step at a time.
Cut manageable sections using a utility knife.
Take extra care with tack strips along stair edges—they’re sharper than wall strips.
Doorways and Flooring Transitions
When you reach doorways, cut carpet at the metal transition strip.
You may leave the metal strip in place or remove it with a pry bar if needed.
Watch for screws or nails holding the strip down.
Subfloor Inspection and Cleanup
Once the carpet and padding are gone, give attention to your subfloor.
Check for Damage
Look for mold, moisture spots, or weak areas on the floor.
Fix any damage before installing your new flooring material.
If unsure, consult a flooring specialist to avoid problems down the road.
Thoroughly Clean the Surface
Sweep or vacuum thoroughly.
For concrete, mop lightly to remove adhesive.
For wood, use a tack cloth or dry mop to collect dust—avoid wet cleaning.
Proper Carpet Disposal Tips
Don’t let the removed carpet clutter your space. Dispose of it properly and responsibly.
Recycle When Possible
Check if your city or waste center offers carpet recycling.
Some carpet stores also accept used carpet for repurposing into other products.
Cut for Disposal Compliance
If recycling isn’t available, cut the carpet into smaller pieces that match your local waste collection size rules.
Secure any required large-item pickups with your city’s sanitation department.
Extra DIY Carpet Removal Tips for Success
Stay organized and make the job easier by following these bonus tips:
- Work with a partner to speed up the process
- Use a trash bag to collect staples and scraps as you go
- Take short breaks to prevent fatigue and injury
- Use a magnet to pick up hidden tacks from the subfloor
- Tackle one section at a time to stay focused
When You Should Hire a Pro
Although many can complete carpet removal, you may need help in certain cases:
- Hidden mold or rot appears under the carpet
- Subfloor damage is extensive and requires repairs
- The room layout is unusual or very large
- You’re short on time or have limited physical mobility
- You simply prefer a guaranteed professional result
Conclusion: Tackle Carpet Removal With Confidence
By following these DIY carpet removal tips, you can handle this home improvement project successfully and affordably.
Remove old carpet safely, inspect your subfloor thoroughly, and prepare your space for beautiful new flooring.
Work in sections, use protective gear, and always clean up thoroughly before moving on.
Need more DIY inspiration? Explore more news on this website and keep your home improvement skills sharp!