Painting
Repairing Drywall Holes: A Guide for Small and Large Patches
Drywall Hole Repair Guide: Complete DIY Instructions for Homeowners
Drywall holes, whether small cracks or large gashes, are inevitable in busy homes. Walls endure constant wear from daily activities and occasional accidents. Mastering effective drywall repair techniques helps restore smooth surfaces while preserving your home’s beauty and value.
In this Drywall Hole Repair Guide, you will learn how to repair minor dents, medium holes, and large openings with professional results. You will also find tool lists, repair tips, and painting advice to ensure flawless finishes every time.
You might also enjoy the articles on our other site: P&G and Colgate-Palmolive Face Lawsuits Over Fluoride in Kids’ Products
Understanding Drywall Damage
Before beginning any repair, identify the type and cause of the drywall damage. Different causes often require different repair techniques and materials.
Common Causes of Small Holes
Small holes usually appear when removing nails, screws, or pushpins from hanging decor. Pets scratching or moving furniture can also create them.
Common Causes of Large Holes
Large drywall damage typically comes from impacts. Someone might trip and fall into the wall, or furniture may hit it during a move.
Evaluating the Size of the Hole
Accurately measuring damage size ensures you choose the right repair method. Incorrect sizing can waste time and materials.
Very Small Holes and Dents
Minor blemishes from nails or bumps can be repaired quickly using spackle and a putty knife without replacing any drywall sections.
Small Holes (Doorknob Size)
These holes need an adhesive patch kit to prevent compound collapse. The kit supports spackle or joint compound during drying.
Large Holes (Over One Square Foot)
Extensive damage requires cutting and installing new drywall. Supporting strips prevent sagging while ensuring a strong, long-lasting repair.
Essential Tools and Materials
Having the proper tools and materials ready ensures smooth progress and professional results during your drywall repair.
For Small Hole Repairs:
- Putty knife
- Paint brush
- Patch kit
- Spackle or lightweight joint compound
- Sandpaper
- Primer
- Matching paint
For Large Hole Repairs:
- Measuring tape
- Utility knife
- Pencil
- Drywall saw
- Drill
- Furring strips
- Screws
- Drywall tape
- Joint compound
- Sandpaper
- Primer
- Matching paint
Repairing Very Small Holes and Dents
Small dents and holes require simple patching techniques. These repairs take little time but still demand attention for a seamless finish.
Step 1 – Identify All Damage
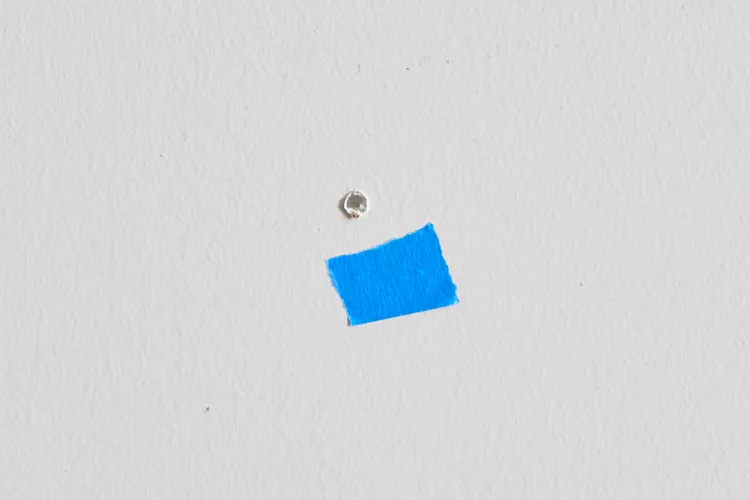
Carefully examine your walls by running your hand over them. Mark each dent or hole with painter’s tape for quick locating later.
Step 2 – Apply Spackle to Holes
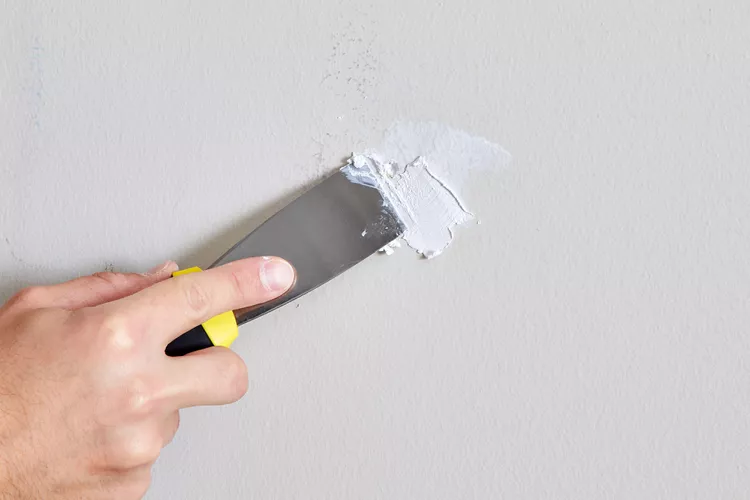
Using a putty knife, press spackle firmly into each hole. Smooth slightly, leaving a thin layer for sanding later.
Step 3 – Allow Spackle to Fully Dry
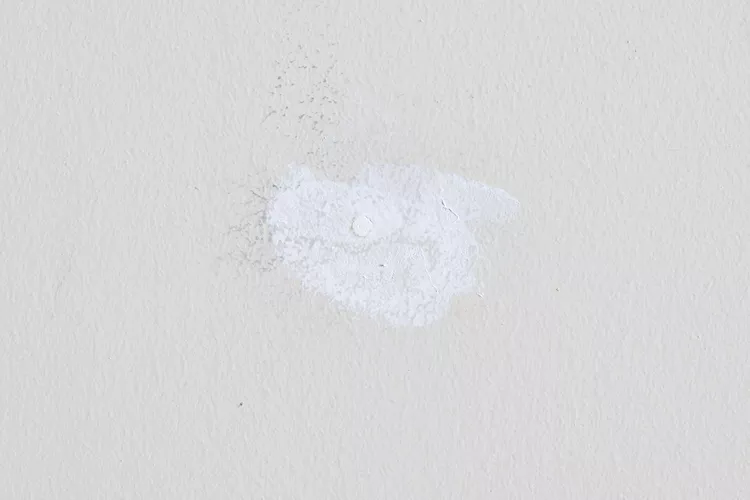
Follow manufacturer drying times. Proper drying ensures the spackle hardens correctly, providing a strong, durable patch for painting.
Step 4 – Sand and Repaint
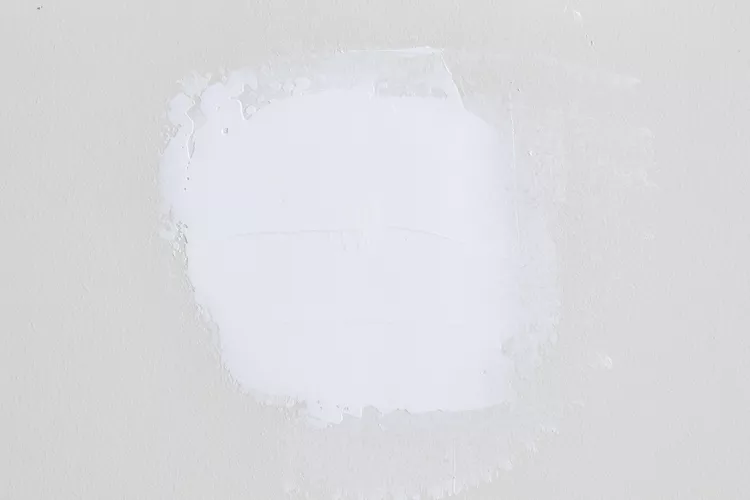
Sand patched areas until smooth. Apply primer and matching paint for a uniform finish that blends perfectly with the surrounding wall.
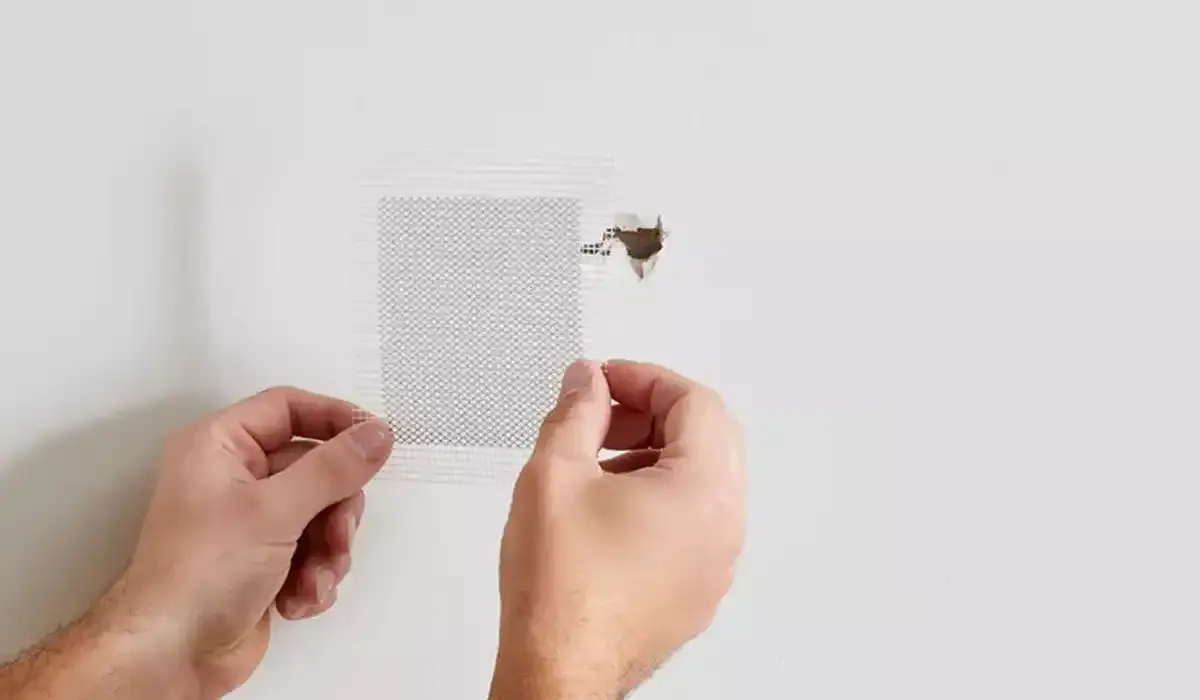
Repairing Small Holes Using Patch Kits
Self-adhesive mesh patch kits are excellent for holes roughly the size of a doorknob. This method creates a strong base for compound application.
Step 1 – Prepare the Hole Edges
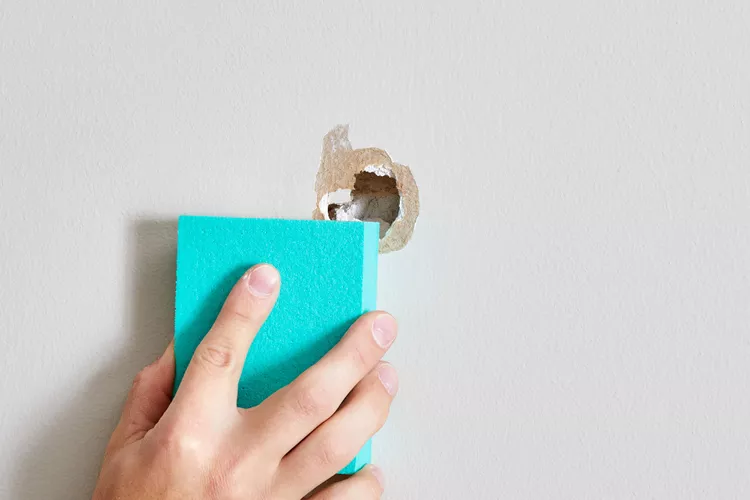
Smooth edges using sandpaper or a putty knife to help the adhesive patch stick evenly without creating lumps.
Step 2 – Position the Patch
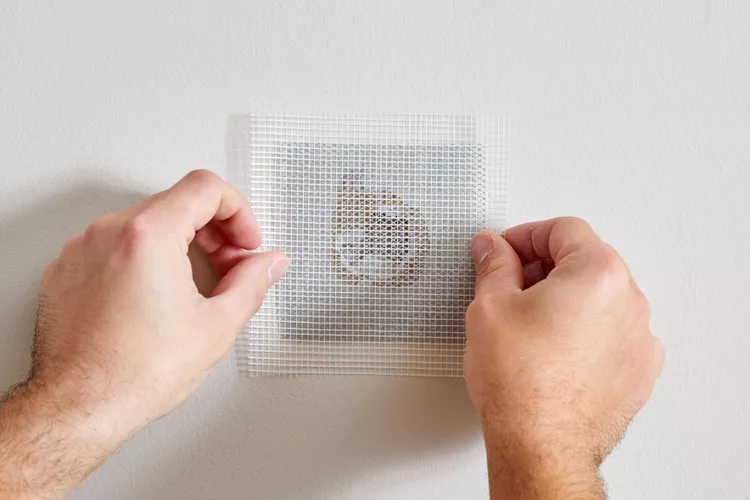
Place the patch over the hole and press firmly. Ensure even adhesion to avoid raised areas after applying compound.
Step 3 – Spread Spackle or Compound
Apply compound over the patch, feathering edges for a natural blend with the wall surface. Add a second layer if necessary.
Step 4 – Dry, Sand, and Paint
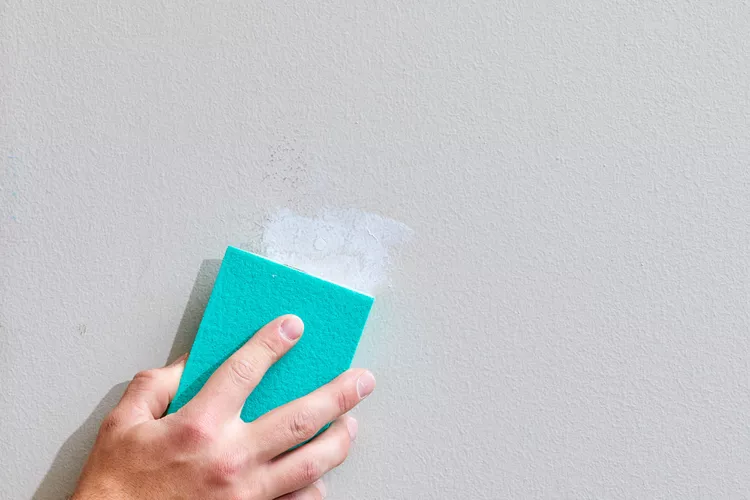
Let the compound dry completely. Sand to a smooth finish, prime the area, and paint to match the surrounding surface.
Drywall Hole Repair Guide for Large Holes
Repairing large drywall holes requires more steps and attention to structural support. Follow these instructions for strong, seamless results.
Step 1 – Measure and Cut Drywall Patch
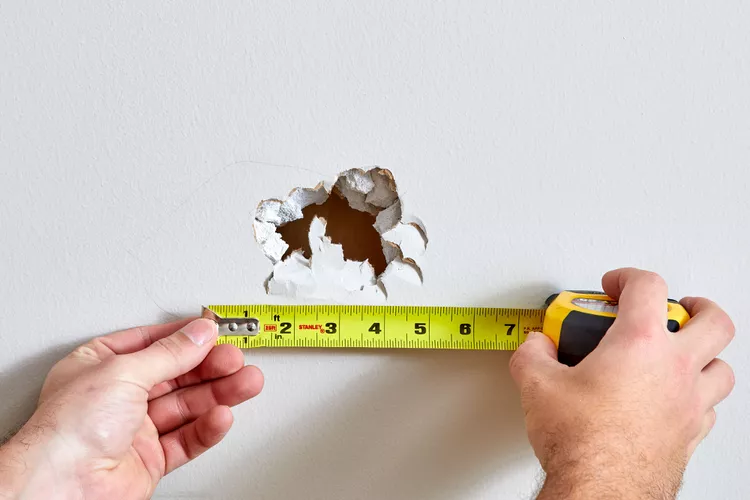
Measure the hole carefully and cut a drywall piece slightly larger to ensure a clean, regular shape during trimming.
Step 2 – Trim Hole to Match Patch Size
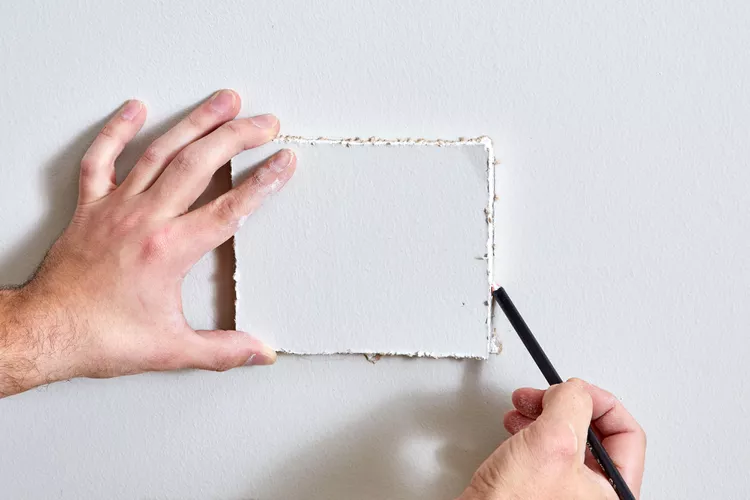
Place the patch over the hole, trace its outline, then cut the wall along this line using a drywall saw.
Step 3 – Install Furring Strips
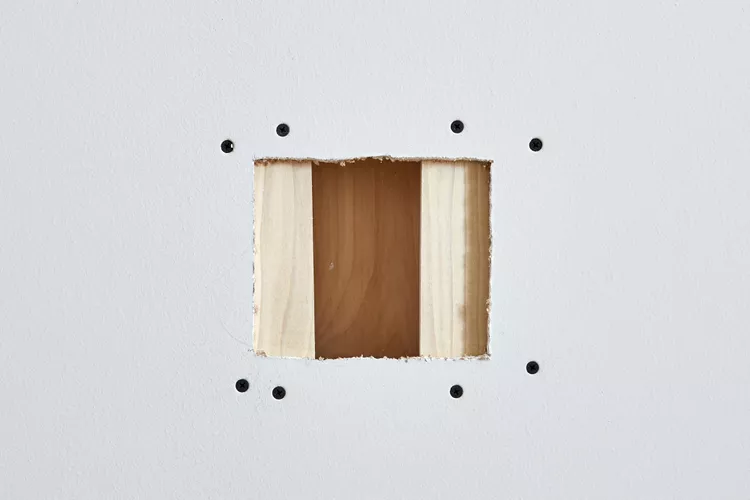
Insert wooden furring strips vertically inside the wall. Secure them with screws so they extend halfway into the hole for support.
Step 4 – Secure the Drywall Patch
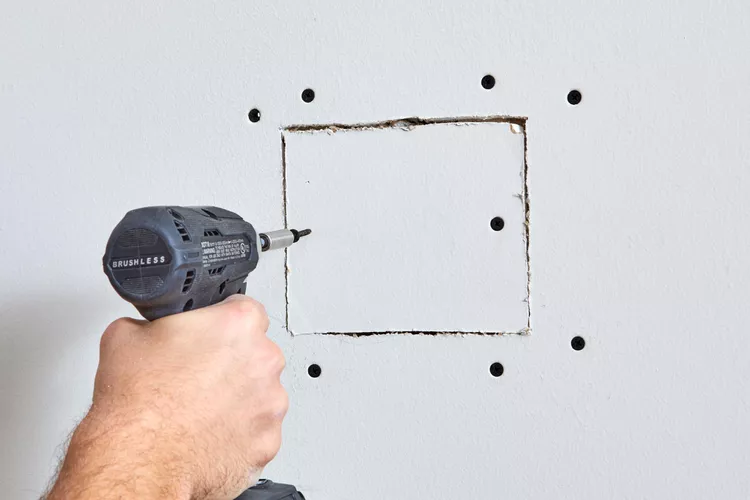
Position the patch against the furring strips and screw it in place. Ensure a tight fit without any movement.
Step 5 – Apply Joint Tape and Compound
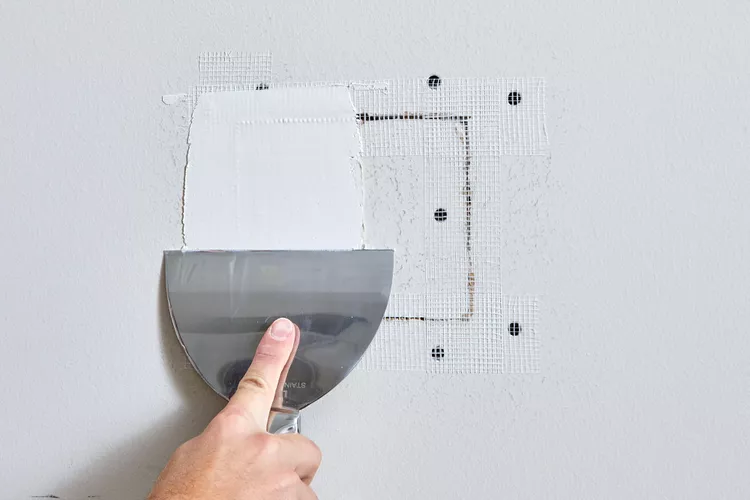
Cover seams with mesh joint tape. Apply compound over the tape, smoothing edges for a seamless blend with existing drywall.
Step 6 – Dry, Sand, and Prime
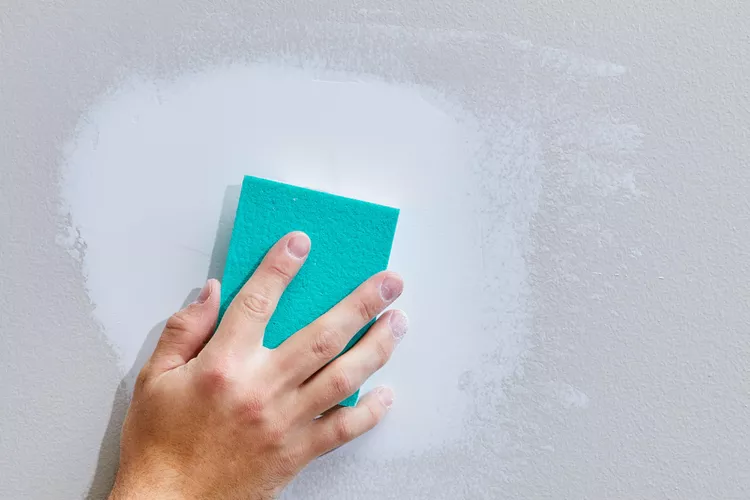
Let the compound dry completely. Sand until smooth, then prime to prepare for paint application and prevent texture differences.
Step 7 – Apply Paint for Final Finish
Paint the repaired area using color-matched paint. Consider repainting the entire wall if the repaired section is highly visible.
Special Considerations for Textured Walls
Repairing textured drywall requires additional steps for an invisible finish.
Use spray texture or manual application to match the existing wall pattern. Always test on scrap drywall before applying to the repair.
Painting Tips After Repairs
Painting ensures the patched section blends with the rest of the wall. Follow these tips for a professional-looking result.
- Always prime patched areas before painting to prevent uneven color absorption.
- Match paint precisely by taking a chip to the paint store.
- Use leftover paint only if it perfectly matches the current wall color.
Touch-Ups vs. Full Wall Painting
Decide whether to touch up or repaint the entire wall after completing your repairs.
Touch-ups work for small, perfectly blended patches. Large repairs on visible walls often look best when the whole wall gets repainted.
Drywall Hole Repair Guide Recap
In this Drywall Hole Repair Guide, you learned how to fix minor dents, patch small holes, and replace sections for large damage.
Using the right tools, preparing surfaces properly, and following each step ensures your repairs look professional and last for years.
Final Tips for Flawless Drywall Repairs
- Follow drying times exactly for durable patches.
- Feather compound edges to hide repair transitions.
- Use high-quality primer to ensure consistent paint texture.
- Repaint entire walls for the best large repair blending.
Conclusion
Drywall damage is unavoidable in active households, but with the right methods, every homeowner can restore walls to their original beauty.
By applying the techniques in this Drywall Hole Repair Guide, you can confidently tackle repairs, save money, and enjoy flawless results.
You might also enjoy the articles on our other site: How to Encourage Curiosity in Children
For more expert DIY advice and home maintenance tips, explore more news on this website.