Laundry
Expert Tips for Cleaning Your Microwave the Easy Way
Cleaning a microwave may seem annoying, but it doesn’t have to be. In fact, learning how to clean a microwave effectively saves time, removes odors, and keeps your food safe. Dirty microwaves collect food splatter, grease, and bacteria. Thankfully, you can clean it quickly with just a few simple tools and natural ingredients.
Why Regular Microwave Cleaning Matters
Microwaves work best when they stay clean. Greasy buildup and stuck-on food reduce efficiency and can even damage the appliance over time.
- Prevent Odors and Contamination
Old food particles create bad smells and may contaminate anything you heat. Clean often to avoid those nasty microwave surprises. - Increase Microwave Lifespan
According to cleaning pros, consistent maintenance can help your microwave last up to 10 years—maybe even more if treated well.
How Often Should You Clean Your Microwave?
Clean your microwave once a month, or more often if you use it daily. Wipe spills immediately before they harden and stain.
- Don’t Wait for a Mess
If something spills, wipe it up right away. Acting fast prevents long scrubbing sessions and keeps your microwave always ready. - Clean the Exterior Weekly
Wipe the outer surface and control panel with a damp cloth each time you clean your kitchen counters. It makes a difference.
Step-by-Step: How to Deep Clean a Microwave
Let’s walk through the safest, easiest method using items you likely already have in your kitchen.
What You’ll Need
- Microwave-safe bowl
- Distilled vinegar or lemon juice
- Water
- Spray bottle
- Sponge
- Soft cloth
- Dish soap
- Toothpick or wooden spoon
Step 1: Spot-Spray Stains
Mix equal parts water and vinegar in a spray bottle. Spray heavily soiled areas inside your microwave to loosen grime before steaming.
Step 2: Make a Steaming Solution
Fill a microwave-safe bowl with 2 cups of water and 2 tablespoons of vinegar or lemon juice. Add a wooden spoon or toothpick.
This helps prevent the water from superheating and “exploding” inside the microwave. Safety first!
Step 3: Steam the Interior
Place the bowl inside and microwave it on high for three minutes. Let it sit for another 15 minutes before opening the door.
The steam softens buildup so you can easily wipe it away. Be careful—the bowl will be hot!
Step 4: Remove and Clean Parts
Take out the bowl using oven mitts. Remove the turntable and wash it in the sink with dish soap and hot water.
Step 5: Wipe Down Interior Surfaces
Use a damp microfiber cloth dipped in the vinegar-water mix. Wipe the top, sides, bottom, and door of your microwave thoroughly.
For tough spots, use a soft-bristled brush or sponge. Always avoid abrasive scrubbers that could scratch the interior.
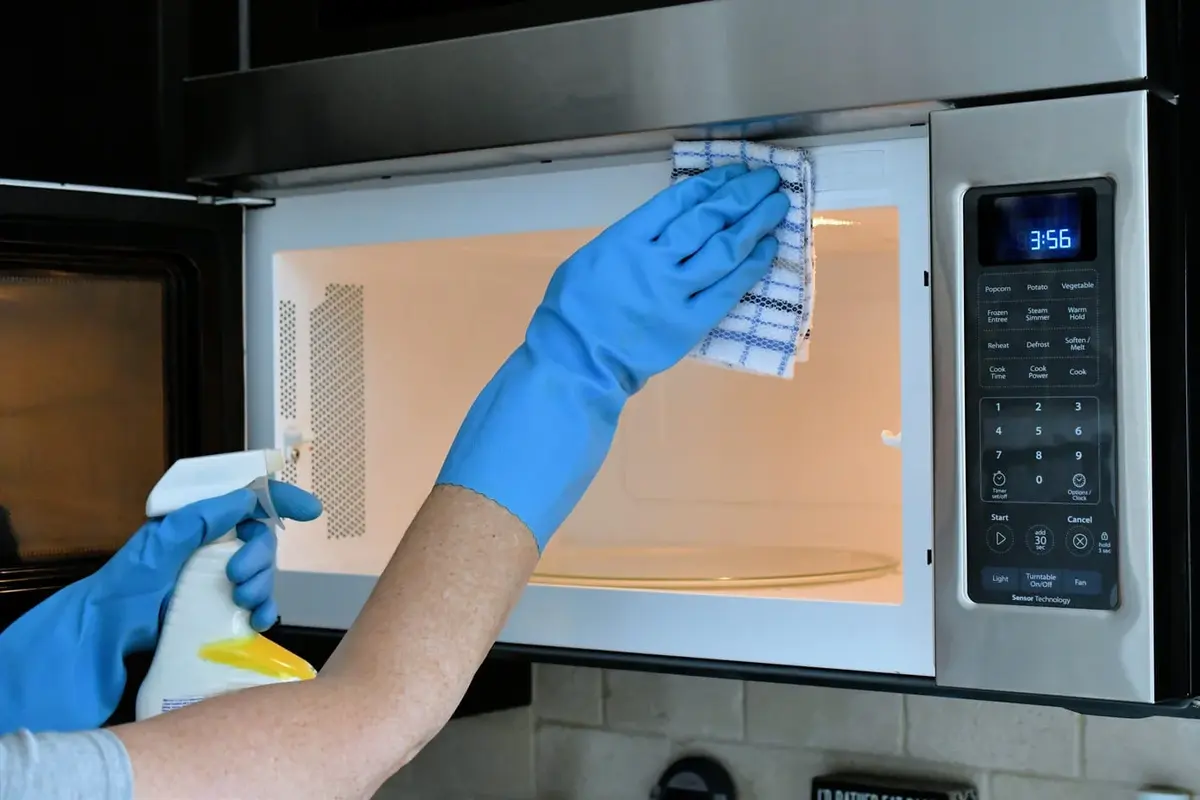
Step 6: Clean the Exterior
Use an all-purpose cleaner and a cloth to clean the microwave’s outer surface. For stainless steel, wipe with the grain only.
Spray the cleaner on the cloth—not the control panel—to avoid electrical issues or unwanted moisture around buttons.
Step 7: Clean the Filter (If Applicable)
Above-range microwaves often have grease filters. Remove them carefully and soak them in hot, soapy water for 15 minutes.
Add baking soda for extra grease-fighting power. Scrub, rinse thoroughly, and let them dry fully before reinstalling.
Maintenance Tips: Keep Your Microwave Cleaner Longer
A few smart habits can reduce how often you need deep cleaning. Follow these to maintain a spotless microwave.
- Cover Food Every Time
Use a microwave-safe cover or even a paper towel to stop splatter. This one habit makes cleanup way easier. - Use the Right Containers
Avoid plastic that melts or foam that sparks. Choose glass or ceramic containers marked “microwave-safe” for best results. - Avoid Overheating
Microwave food using the proper time and power level. This keeps your food from bubbling over and creating big messes.
Final Thoughts
Now that you know how to clean a microwave the right way, it doesn’t feel so intimidating anymore. With just a few natural ingredients and simple steps, you can keep your microwave looking and smelling fresh every day. Regular cleaning makes your appliance last longer and helps your food taste better.
✅ Want more expert home care advice?
Explore more tips, tricks, and cleaning hacks on our website for a cleaner, smarter home!Courtesy of Envato