Lightning & Electrical
Step-by-Step Guide to Rewiring a Lamp
How to Rewire a Lamp: A Simple and Safe DIY Guide
Learning how to fix lamp wiring can save you money and preserve beautiful pieces. Whether you’re fixing a broken lamp or refreshing an antique, this guide walks you through it all. Stay safe, use the right tools, and follow clear steps to restore your lamp efficiently.
Safety Comes First: Protect Yourself Before You Begin
Safety must come first in every electrical task. Before rewiring your lamp, make sure the cord is unplugged completely.
Work in a clean, dry, and well-lit area to see all parts clearly and avoid electrical hazards.
Wear protective gear like rubber-soled shoes and safety glasses to avoid shocks and flying debris.
Use insulated tools to handle wires securely without risking injury.
Tools and Materials Needed
You’ll need the following items to rewire a lamp successfully:
- Wire stripper
- Screwdriver
- Needle-nose pliers
- Replacement cord
- Multimeter (optional but helpful)
Prepare all these tools before you start. Being organized keeps the process smoother and safer.
How to Rewire a Lamp Step by Step
Here’s how to rewire a lamp in a safe, efficient way using simple tools and techniques. Follow each step carefully.
Step 1: Check and Gather the Right Materials
Bring your lamp to a hardware store to identify the correct replacement cord and plug.
Know the difference between flat cords and round cords, as they require different plug types.
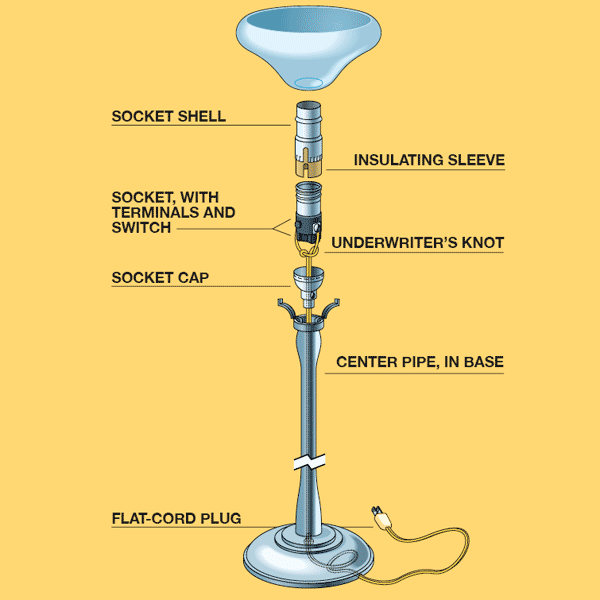
Each lamp socket includes a shell, switch, screw terminals, sleeve, and protective cap.
A plug consists of a shell, body, and cord clamp—these must match your lamp’s cord type.
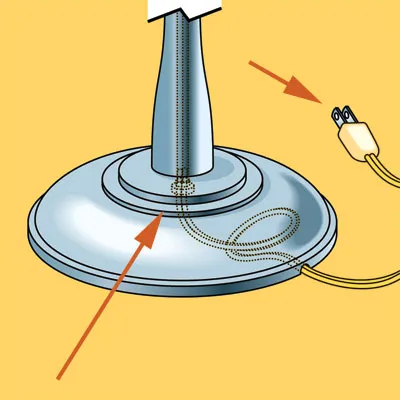
Step 2: Remove the Lamp Base Safely
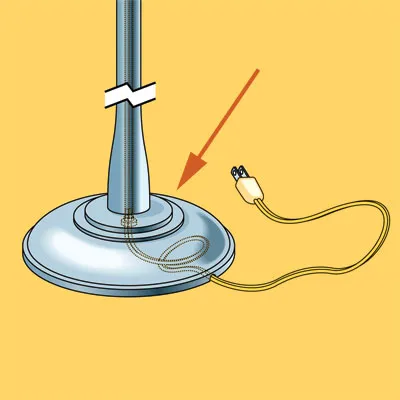
Pry off the felt bottom and loosen the nut holding the lamp’s center pipe.
Pull the pipe out partially from the top and remove the old socket.
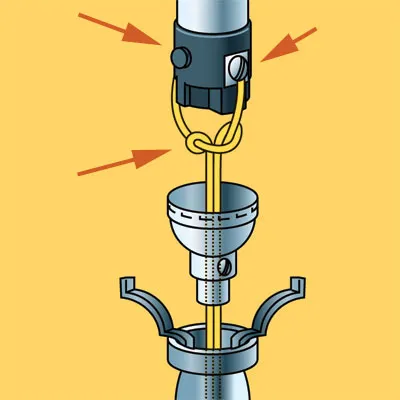
Step 3: Thread in the New Cord
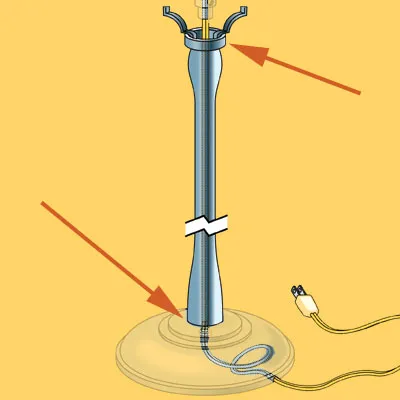
Cut off the old cord and tie it to the new one.
Pull both cords through the pipe, then snip and discard the old wire.
This ensures a cleaner and more secure setup for the new wiring.
Step 4: Make Proper Wire Connections
Split the top 2 inches of the new cord and strip ½ inch of insulation.
Loop wire ends and identify hot and neutral wires clearly.
Connect the hot wire to the brass screw and the neutral wire to the silver one.
Screw in the new socket and slide on the sleeve and shell.
Step 5: Reassemble the Lamp and Attach the Plug
Tighten the nut and reattach the lamp base.
Replace old felt if needed to protect furniture surfaces.
To finish the process, learn how to rewire a lamp plug based on the plug type.
Split and strip wire ends, tie an underwriter’s knot, and connect the wires securely.
Ensure the correct wire goes to the correct prong, then close and clamp the plug.
Troubleshooting Common Lamp Wiring Issues
Even with care, some issues may arise after rewiring. These common solutions can help solve them quickly.
Corroded Metal Parts
- Clean gently using a wire brush.
- Apply electrical contact cleaner for better conductivity.
- Replace parts if corrosion remains severe.
Switch or Bulb Issues
- Check for loose wire connections.
- Make sure the bulb works and fits well.
- Use a multimeter to test the switch if the lamp doesn’t light up.
- Replace the switch if necessary.
If any problems continue, consult a qualified electrician for safe and proper repair.
Ready to Light Up Your Home?
Now you know how to rewire a lamp safely and efficiently. Take pride in restoring your favorite pieces on your own. For more DIY tips, design ideas, and home upgrades, explore more news on this website today!