Kitchen
Step-by-Step Guide to Installing Under Cabinet Lighting
How to Master Under Cabinet Lighting Installation
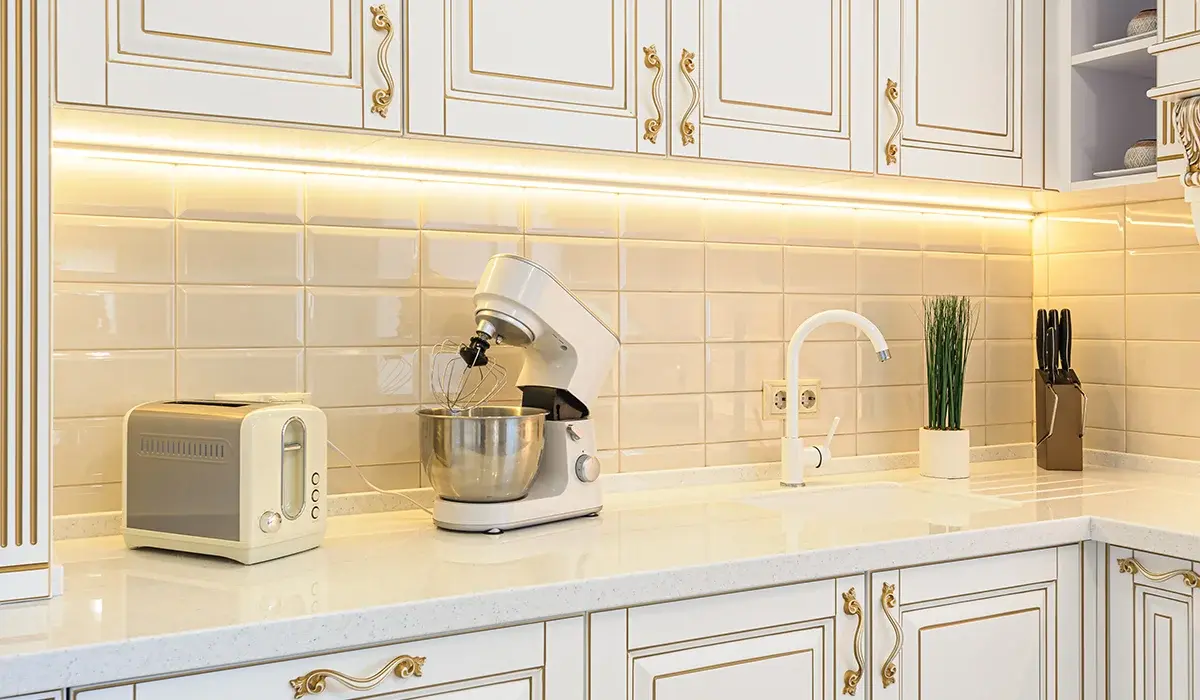
Transform your kitchen into a well-lit and efficient space with under cabinet lighting. This simple upgrade delivers big impact.
In today’s modern kitchen, lighting plays a crucial role in both function and style. Proper lighting increases visibility while preparing food and adds ambiance. One of the best upgrades you can install is under cabinet lighting. These lights brighten countertops, reduce shadows, and improve your cooking experience. In this guide, you’ll learn how to handle the entire under cabinet lighting installation process from start to finish.
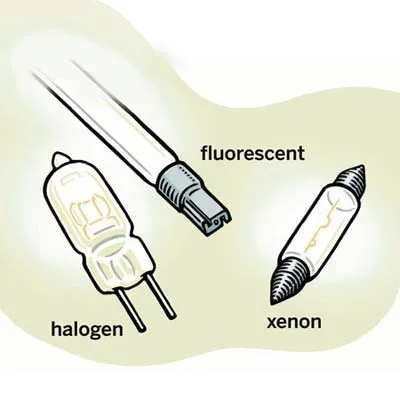
Understanding the Types of Under Cabinet Lights
Before you begin the installation, you need to choose the right lighting. Several options are available to match your needs.
LED Lights
LED fixtures are energy-efficient, long-lasting, and provide consistent brightness. They are cool to the touch and require little maintenance.
Fluorescent Lights
Fluorescent lights cost less than LEDs and offer good illumination. However, they may hum and need bulb replacements regularly.
Halogen and Xenon Lights
These lights offer bright white illumination and work well for detailed tasks. However, they generate more heat than LEDs.
Preparing for Under Cabinet Lighting Installation
Before you start, gather all the necessary tools and materials. This ensures a smooth and efficient setup process.
Tools and Materials You’ll Need
- Drill and drill bits
- Voltage tester
- Wire strippers
- Screwdrivers
- Wire connectors
- Electrical box
- LED light fixtures
- 12/2 NM electrical cable
- Dimmer switch
- GFCI outlet
- Tape measure
Stay Safe Before You Begin
Always cut power at the main panel before working on electrical connections. Use a voltage tester to verify power is off.
Also, unplug nearby appliances to avoid accidents. Safety first should always be your top priority during any electrical project.
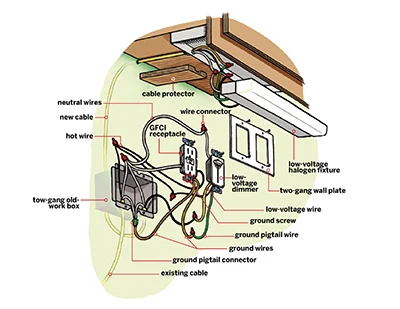
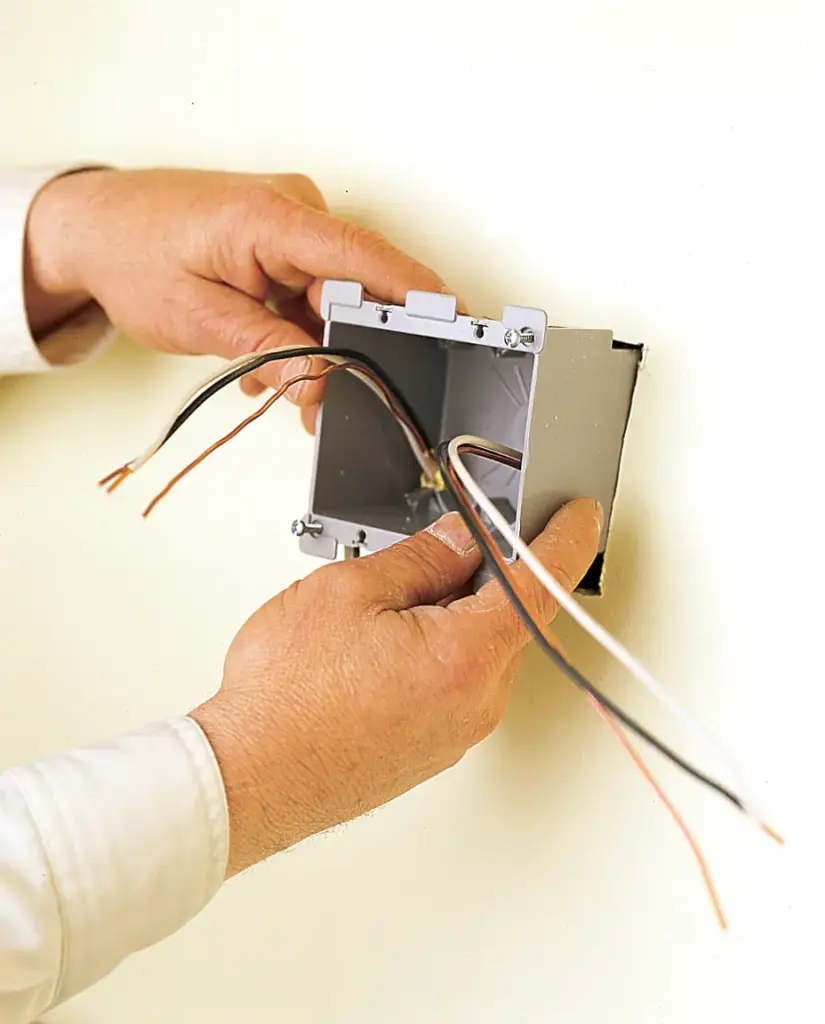
Setting Up the Electrical Box
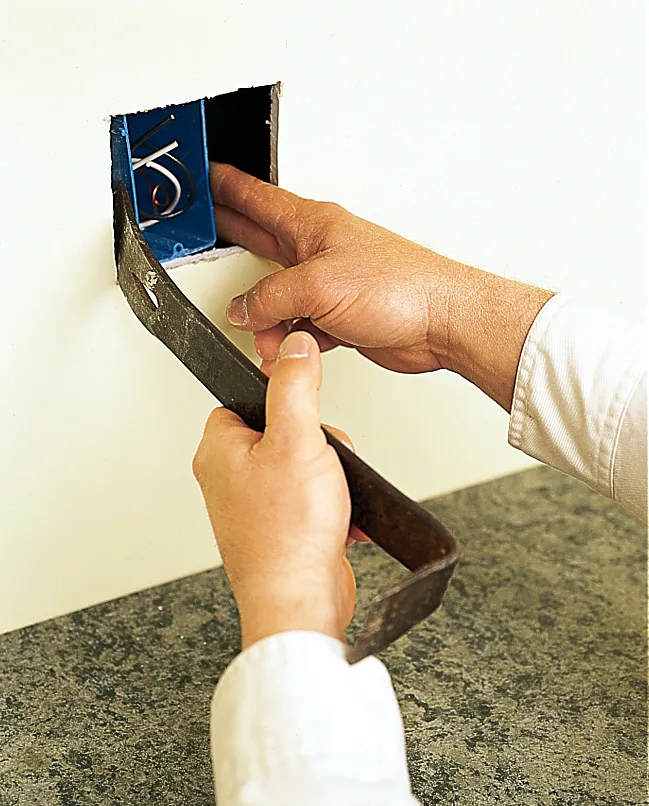
To begin your under cabinet lighting installation, you’ll first need to install a new electrical box.
- Remove the existing outlet cover plate.
- Disconnect wires from the outlet.
- Trace the new box’s outline next to the old one.
- Cut along the traced lines using a drywall saw.
- Pull wires through the new two-gang box and secure it firmly.
Running the Electrical Cable
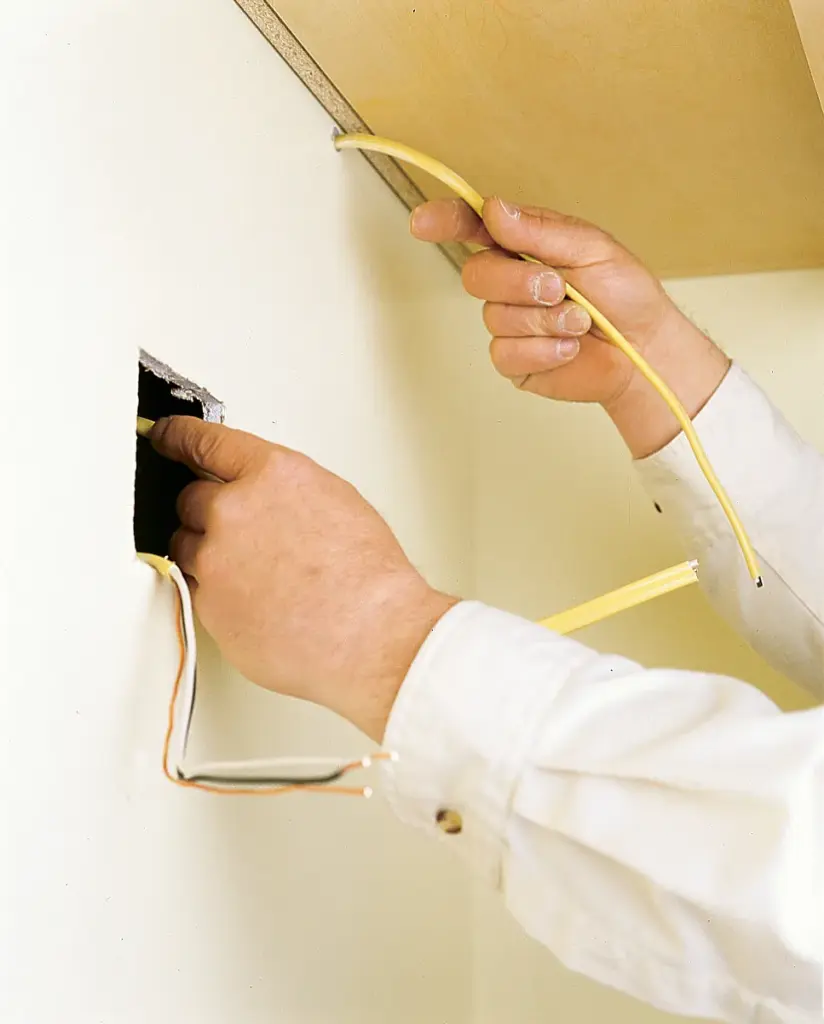
Once your electrical box is ready, you can now route the electrical cable for your lighting fixtures.
- Determine the best route for your wires.
- Drill ½-inch holes through cabinet backs if needed.
- Measure and cut enough cable to reach all fixtures.
- Thread the cable through the holes and secure it in place.
- Leave extra wire slack for easy connections later.
Use clamps or fasteners to prevent wire slippage and damage during installation. Check everything twice to ensure safe setup.
Installing the Light Fixtures
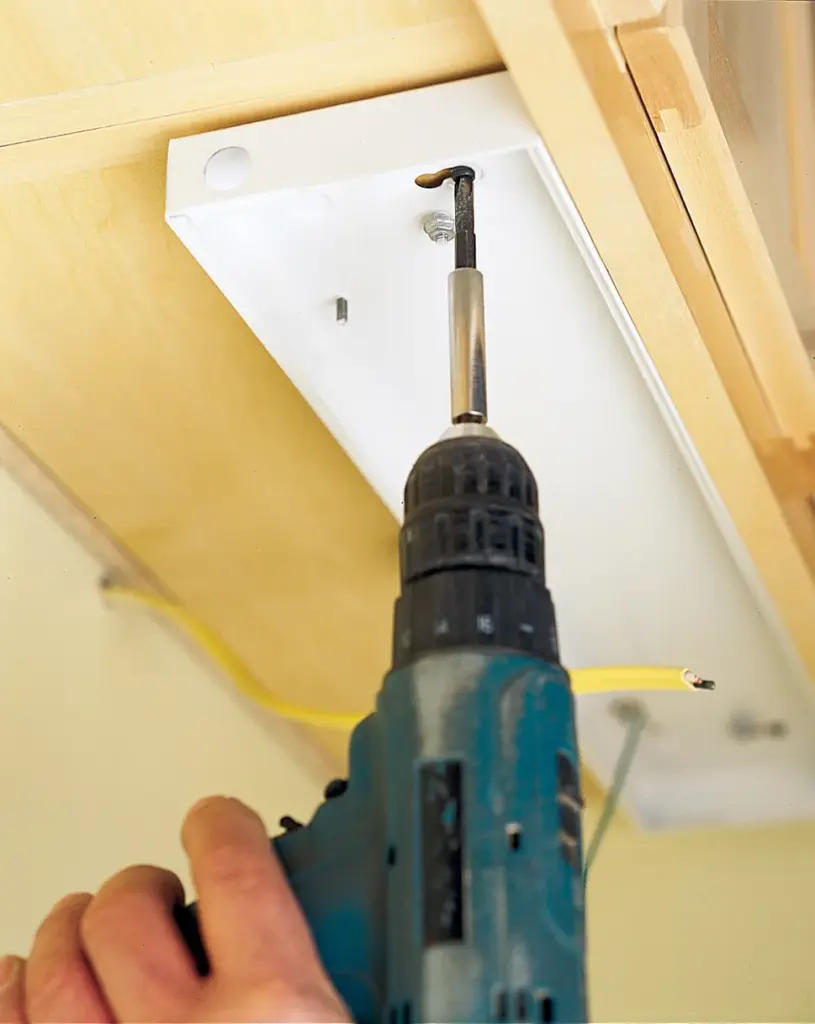
After routing your cable, it’s time to install the light fixtures under your kitchen cabinets.
- Remove each light fixture’s cover plate.
- Hold the fixture under the cabinet and mark the screw holes.
- Drill pilot holes to avoid splitting the wood.
- Screw the fixtures in place securely.
Connecting the Cable
- Remove the knockout plug on the back of each fixture.
- Install a cable connector in the hole.
- Feed the electrical wire through the connector.
- Strip 6 inches of sheathing from the cable.
- Secure it with the connector and ensure proper alignment.
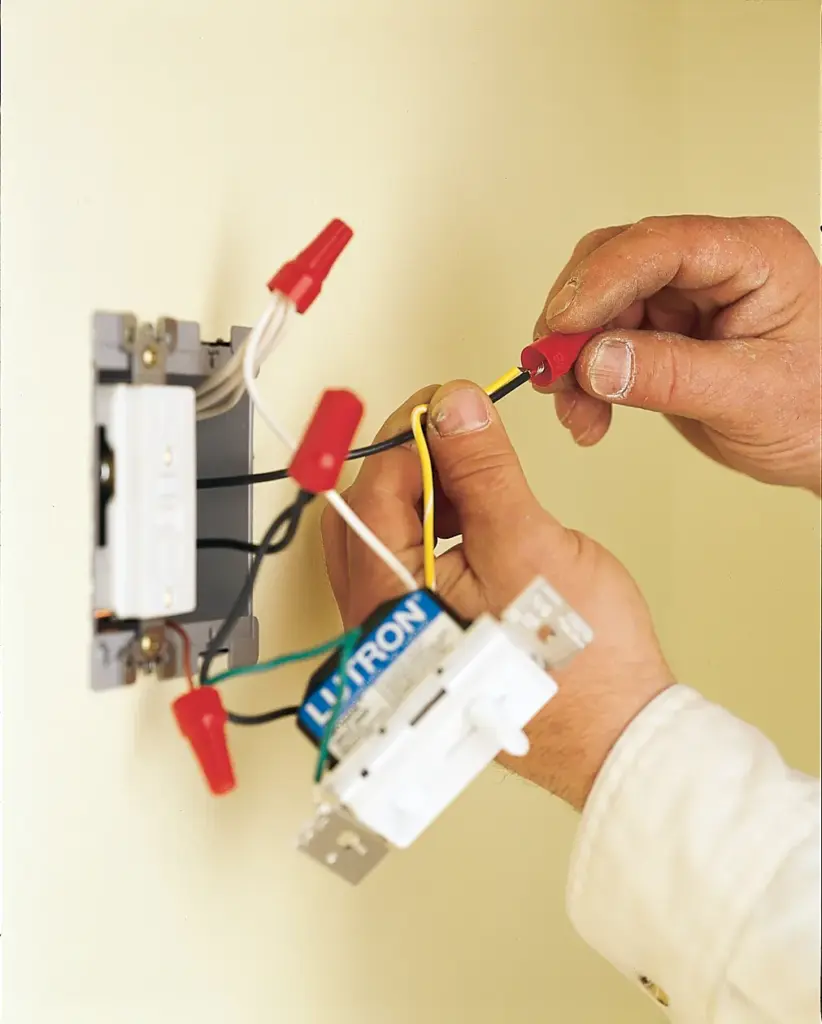
Wiring the Switch and Fixtures
Next comes the wiring process. This part is critical for safe and effective under cabinet lighting installation.
- Connect the black wire to the dimmer switch input.
- Link the red wire from the switch to each light fixture’s black wire.
- Bundle all white wires together with a wire nut.
- Connect ground wires together and to the grounding screw.
Secure each connection tightly. Loose wires can lead to poor performance or even electrical hazards. Always double-check each connection.
Installing the GFCI Outlet
A GFCI outlet provides extra safety by shutting off power if it detects a short circuit or overload.
- Strip and cut wire sections as described.
- Match white wires to silver terminals on the GFCI outlet.
- Match black wires to brass terminals.
- Attach the ground wire to the green screw.
- Secure the outlet into the box and install the cover plate.
Now the outlet is ready to power your under cabinet lights. Test it before finalizing everything.
Installing the Dimmer Switch
A dimmer switch offers flexibility by adjusting brightness levels for tasks or ambient lighting.
- Connect the dimmer’s terminals as described earlier.
- Carefully push wires into the electrical box.
- Secure the dimmer with mounting screws.
- Attach the faceplate and ensure everything is aligned.
Dimmer switches can flicker if not matched with the right LED lights. Always check compatibility before final installation.
Testing Your New Under Cabinet Lights

Now it’s time to test the system and enjoy the benefits of a well-lit kitchen space.
- Turn power back on at the main panel.
- Test the dimmer switch for proper function.
- Make sure each fixture lights up as expected.
- Watch for flickering, buzzing, or dimming issues.
If a light doesn’t turn on, recheck the wiring connections. Sometimes, a loose wire can cause the issue.
Benefits of Modern LED Under Cabinet Lights
LED lights offer many advantages over traditional lighting options. Here are some great reasons to make the switch:
- Long lifespan with minimal maintenance
- Cool operation prevents overheating
- Various color temperatures suit different styles
- Energy efficiency saves money over time
- Brighter and more focused task lighting
LED lighting, as shown in expert tutorials, provides more consistent and comfortable countertop illumination. This improves kitchen tasks significantly.
Maintenance Tips for Long-Lasting Performance
Keeping your under cabinet lights clean and functioning is simple. Just follow these easy maintenance tips.
- Wipe light covers regularly with a soft, damp cloth.
- Avoid harsh cleaners that can damage finishes.
- Check all connections every few months.
- Dust fixtures to maintain brightness.
- Use a compatible dimmer to prevent flickering.
Proper care ensures your under cabinet lighting system remains in great condition for years to come.
Why Choose Under Cabinet Lighting Installation?
Under Cabinet Lighting Installation offers many benefits for homeowners. First, it enhances the visual appeal of your kitchen. Also, it increases safety by reducing shadows while cooking or using sharp tools. Additionally, it improves energy efficiency and home value.
Incorporating under cabinet lighting installation into your renovation plan delivers both beauty and function. This project also helps homeowners enjoy better visibility and control in the kitchen.
Conclusion
Installing under cabinet lighting is a practical upgrade for any modern kitchen. The project adds style, function, and improved lighting. With the right tools and a bit of preparation, you can complete the entire under cabinet lighting installation confidently.
Explore more home improvement ideas, how-tos, and smart upgrades by visiting our website. Discover inspiration that makes your home shine!